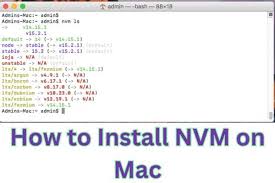
If you’re a developer working with Node.js on your Mac, you’ve probably encountered the need to switch between different Node.js versions for your projects. This is where NVM (Node Version Manager) comes to the rescue. NVM allows you to manage multiple Node.js versions with ease, ensuring that you can work on various projects with different version requirements. In this guide, we’ll walk you through the steps to install NVM on your Mac and get started with version management.
Prerequisites
Before you begin, make sure you have the following prerequisites in place:
- A Mac computer running macOS.
- A terminal application (e.g., Terminal, iTerm, or Hyper) installed on your Mac.
Step 1: Installing NVM
To install NVM on your Mac, follow these steps:
- Open your terminal application.
- Navigate to your home directory using the cd command:
shellCopy code
cd ~
- Use the curl command to download the NVM installation script from the official GitHub repository. You can find the latest script URL by visiting the NVM GitHub page.
shellCopy code
curl -o- https://raw.githubusercontent.com/nvm-sh/nvm/v0.39.0/install.sh | bash
Note: Make sure to replace the URL with the latest version if it has been updated since this guide was written.
- Once the installation is complete, you should see a message indicating that NVM has been successfully installed.
- Close and reopen your terminal or run the following command to refresh your shell:
shellCopy code
source ~/.bashrc
If you’re using a different shell, such as Zsh, you should source the appropriate file (e.g., ~/.zshrc).
Step 2: Verify NVM Installation
To confirm that NVM has been installed successfully, run the following command:
shellCopy code
nvm –version
This command should display the installed version of NVM. If you see the version number, it means that NVM has been installed correctly.
Step 3: Installing Node.js Versions
Now that NVM is installed, you can easily manage Node.js versions. To install a specific Node.js version, use the following command:
shellCopy code
nvm install <node_version>
For example, to install Node.js version 14, you can run:
shellCopy code
nvm install 14
You can install multiple Node.js versions and switch between them as needed for your projects.
Step 4: Switching Between Node.js Versions
To switch between Node.js versions, use the following command:
shellCopy code
nvm use <node_version>
For instance, to switch to Node.js version 14, run:
shellCopy code
nvm use 14
This will set Node.js version 14 as the active version for your current terminal session.
Step 5: Setting a Default Node.js Version
You can also set a default Node.js version to be used in new terminal sessions. To do this, run:
shellCopy code
nvm alias default <node_version>
For example, to set Node.js version 14 as the default, use:
shellCopy code
nvm alias default 14
Now, every time you open a new terminal window or start your computer, the specified default Node.js version will be active.
Conclusion
Congratulations! You’ve successfully installed NVM on your Mac and can now manage multiple Node.js versions effortlessly. This flexibility allows you to work on different Node.js projects without worrying about compatibility issues. Enjoy your development journey with NVM on your macOS-powered machine.
Also Read: Create an App from Scratch in 10 Steps


